welt pocket tutorial

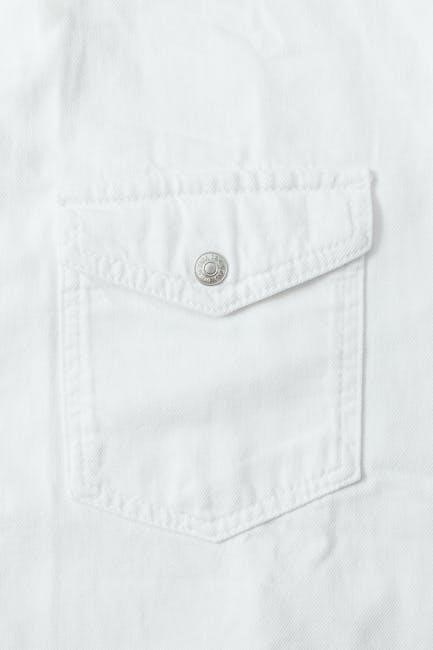
A welt pocket is a tailored, bound pocket, commonly found in men’s jackets or blazers, known for its elegant fabric binding and professional finish.
What is a Welt Pocket?
A welt pocket is a tailored, bound pocket commonly found in garments like jackets, blazers, and trousers. It features a narrow fabric edge, known as the welt, which frames the pocket opening, creating a clean, professional finish. The welt is typically made from the same fabric as the garment, though contrasting fabrics can be used for decorative purposes. Unlike other pockets, the welt pocket lies flat against the garment, making it nearly invisible when not in use. The pocket itself is attached to the inside of the garment, with the welt visible on the outside, adding a touch of elegance and sophistication. This design is popular for its sleek appearance and functionality.
Why Use a Welt Pocket?
A welt pocket is favored for its sleek, professional appearance and functionality. It lies flat against the garment, making it ideal for tailored pieces like jackets and trousers. The welt pocket is durable and can hold small items securely without bulging, maintaining a streamlined look. It adds a touch of elegance, especially when made from matching fabric, creating an invisible look. For contrast, it can also be made from a different fabric to add a pop of color. This pocket style is versatile, suitable for both casual and formal wear, and is a hallmark of high-quality tailoring due to its clean finish and professional aesthetics.
Common Applications of Welt Pockets
Welt pockets are commonly used in tailored garments such as men’s jackets, blazers, and trousers. They are ideal for adding a professional touch to vests, coats, and even skirts. Often seen in formal wear, welt pockets are also suitable for casual pieces like bomber jackets, where they can be slanted for easy access. They are a popular choice for garments requiring a sleek, streamlined look, as they lie flat against the fabric. Welt pockets are also used in accessories like bags and can be adapted to include zippers for added functionality. Their versatility makes them a favorite in both high-end fashion and everyday clothing, offering durability and style in various applications.
Materials and Tools Needed
To create a welt pocket, you’ll need fabric, interfacing, scissors, a ruler, pins, a sewing machine, and a seam ripper. These tools ensure professional results.
Fabric Requirements
For a welt pocket, use fabric that matches your garment for an invisible look or contrasts for a decorative touch. The welt fabric should be lightweight yet durable, such as cotton or wool. Ensure the fabric is pre-washed to avoid shrinkage. If using a pattern, cut the welt and pocket bag according to the template. For a standard welt, cut two strips of fabric: one for the welt itself and one for the pocket lining. The welt fabric should be slightly wider than the pocket opening to allow for seam allowances. Interfacing is optional but recommended to stabilize the fabric and maintain shape.
Interfacing and Stabilizers
Interfacing is crucial for stabilizing the fabric and maintaining the shape of the welt pocket. Use a lightweight fusible interfacing, such as cotton or polyester, to reinforce the areas around the pocket opening. Cut the interfacing slightly larger than the pocket markings to ensure full coverage. Fuse the interfacing to the wrong side of the fabric, following the manufacturer’s instructions. For a professional finish, ensure the interfacing is centered and smooth. Stabilizers like stay tape can also be used along the pocket edges to prevent stretching during sewing. Proper interfacing ensures crisp folds and a clean appearance, making the welt pocket look polished and professional.
Basic Sewing Tools
To successfully sew a welt pocket, you’ll need a few essential sewing tools. A sewing machine is necessary for precise stitching, while sharp fabric scissors or rotary cutters are ideal for cutting fabric accurately. A ruler or measuring tape ensures accurate measurements for the pocket and welt. Pins will help secure fabric layers during sewing. A seam ripper is handy for correcting any mistakes. An iron and ironing board are crucial for pressing seams and achieving a crisp finish. Additionally, a tailor’s ham or seam roll can help shape the pocket smoothly. Optional tools include a walking foot for heavy fabrics and a zipper foot for precise edgestitching. Having these tools ready will streamline the process and ensure professional results.
Drafting the Welt Pocket Pattern
Drafting a welt pocket involves creating a 6-inch by 1-inch pattern with parallel lines, using a ruler for accuracy. Customize shape, angle, and width as needed easily.
Measuring for a Standard Welt Pocket

Measuring for a standard welt pocket begins with determining the desired length and width of the pocket opening. A typical size is 6 inches long and 1 inch wide, ensuring functionality while maintaining a sleek appearance. The welt itself, which frames the opening, is usually 1/4 inch wide on each side. For a balanced look, the pocket’s length should align with the garment’s proportions. Accurate measurements are crucial to ensure the pocket sits flat and even. Use a ruler to mark parallel lines for the welt edges, ensuring they are evenly spaced and aligned for a professional finish. Precision in measurement ensures a polished result.
Creating a Custom Welt Pocket Template
To create a custom welt pocket template, start by drafting the pattern on paper or cardstock. Determine the desired length and width of the pocket opening, then add the welt width (typically 1/4 inch on each side). Include markings for the pocket bag, ensuring it is proportional to the opening. Add seam allowances around all edges for easy sewing. For a decorative touch, you can shape the welt or pocket bag edges, but ensure the edges align properly. Cut out the template and test it on scrap fabric to confirm accuracy. Adjust measurements as needed before transferring the final template to your garment fabric. This step ensures a perfect fit and professional finish for your welt pocket.
Step-by-Step Sewing Guide
Transfer markings, stitch lines, and cut slits carefully. Press seams, turn the pocket, and secure edges for a professional, clean finish to your welt pocket.
Transferring Pocket Markings
Transferring pocket markings is a crucial step in creating a professional-looking welt pocket. Begin by drawing two parallel lines on interfacing, 6 inches long and 1 inch apart, using a ruler or pattern. These lines guide the stitching and ensure alignment. Fuse the interfacing to the wrong side of the garment fabric, positioning it where the pocket will be. Use a marker to transfer these lines to the fabric, ensuring they are visible and accurately placed. If drafting your own pattern, mark the front and back of the garment to maintain symmetry. Double-check the alignment to avoid mistakes. Accurate markings are essential for a clean, polished finish, making this step foundational to the entire process.
Stitching the Welt Pocket Opening
Machine stitch along the marked lines, stopping precisely at the dots to secure the stitches with backstitching. This ensures a strong and clean bond. Draw a triangle at each end of the stitching lines and a vertical line through the center. Cut a slit through both fabric layers between the stitching lines, carefully avoiding the stitched edges. Press the seam allowance open at the top and bottom of the welt to create a crisp fold. This step prepares the pocket for turning, ensuring a professional finish. Accurate stitching and cutting are vital for a polished welt pocket opening, setting the foundation for the next steps in the process.
Turning and Pressing the Welt Pocket
After stitching and cutting, carefully turn the garment to the wrong side. Reach through the opening and gently pull the pouch through to the wrong side, ensuring it lies flat. Press the pouch flat with an iron to create a crisp fold. Turn the garment back to the right side and press the welt edges to ensure they lie smooth and even. Use a tailor’s ham or seam roll for a professional finish. Adjust the welt fabric as needed to achieve a straight, even opening. This step is crucial for achieving a polished, professional appearance. Proper pressing ensures the pocket is functional and visually appealing, completing the welt pocket construction.
Leave a Reply
You must be logged in to post a comment.